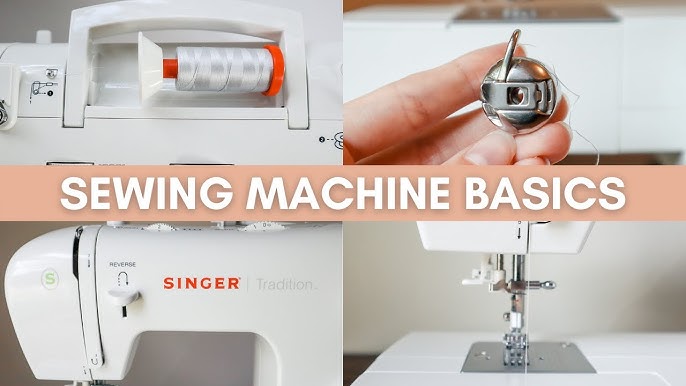
What you’ll do
Thread the top path, seat the bobbin, test tension, and sew straight lines and a seam sample at ⅝″ (1.6 cm).
Setup & threading
- Raise needle & presser foot; follow numbered guides.
- Wind bobbin evenly; insert per machine diagram.
- Hold both threads for first stitches to avoid tangles.
Controls
- Stitch length: 2.5–3.0 for seams; longer for basting.
- Tension: start at default; adjust only if loops show.
- Backstitch at start/end to lock.
Step-by-step
1
Wind & insert bobbin
Wind evenly; install with thread direction per your machine manual.
2
Thread top path
Spool → guides → tension → take-up lever → needle. Raise presser foot first.
3
Bring up bobbin thread
Turn handwheel to catch the bobbin; pull both tails under the presser foot.
4
Test stitches
Use scrap fabric: sew a straight line at 2.5–3.0 length; adjust tension only if loops appear.
5
Seam sample
Guide fabric along a ⅝″ seam guide; backstitch 3 stitches at start and end.
Tips
- New needle = fewer problems. Replace after ~8–10 hours of sewing.
- Let feed dogs move the fabric—don’t push or pull.
- Keep a small brush to clean lint under the needle plate.
Troubleshooting
- Bird’s nest: Presser foot was up during threading or tails not held—rethread and hold tails.
- Skipped stitches: Wrong needle size or type—install a new correct needle.
- Loose loops: Adjust upper tension one click at a time.