What you’ll practice
You’ll build an even value ramp, then blend simple spheres and cylinders to understand edge behavior. The key is gentle layering and crisp re-statements—not smearing.
Tools & papers
- Vine charcoal (lay-ins) + compressed charcoal (darks)
- Charcoal pencil (HB–2B range)
- Blending stumps (large & small) / soft tissue / brush
- Kneaded eraser + vinyl eraser
- Paper: smooth drawing paper or newsprint
- Workable fixative (light mist)
Setup & habits
- Work at a slight angle; keep hands off the drawing area.
- Reserve one stump for lights, one for darks.
- Blend in the direction of form, not circles.
Step-by-step
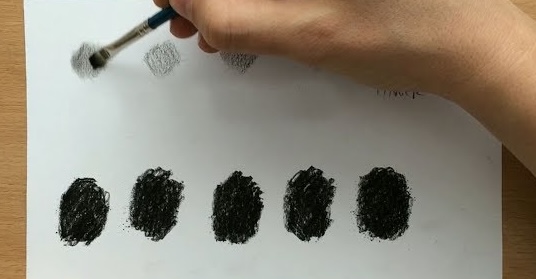
Lay in a value ramp
From light to dark in 6–7 steps, hatch lightly with vine charcoal. Aim for even spacing; don’t blend yet.
First blend pass
Using a clean stump, make one light pass per step. Wipe between values to avoid carryover.
Re-state values
Reapply charcoal to deepen darks and fix mid-steps. Blend lightly if spacing feels uneven.
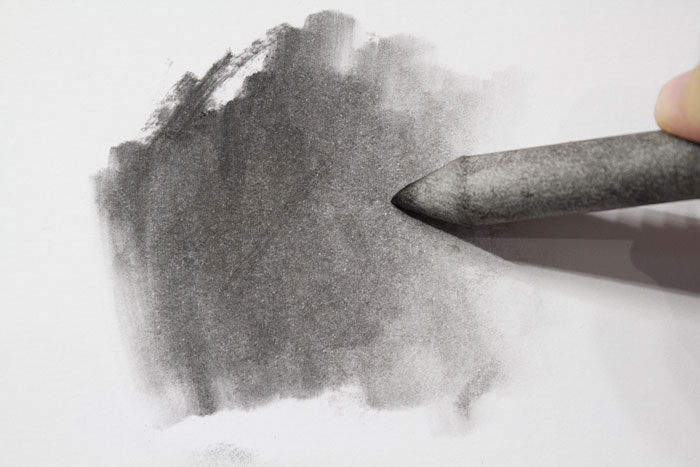
Blend basic forms
Shade a sphere and cylinder with hatch following form. Blend with the form using stump or brush; lift a clean highlight.
Edge control
Sharpen cast-shadow edges with a vinyl eraser; soften turning edges with a very light stump pass.
Fix lightly
Mist workable fixative from 12–16"; let dry. Re-state accents if the fix softens them.
Tips
- Use lighter pressure for the cleanest blends.
- Brushes = super-soft transitions; stumps = more control.
- Do not blend the brightest lights—leave paper sparkle.
Troubleshooting
- Muddy greys: Dirty stump—wipe often; separate stumps for light/dark.
- Chalky highlights: Over-lifted—re-tone with soft hatch and re-blend.
- Banded ramp: Add mid-layers and feather transitions.