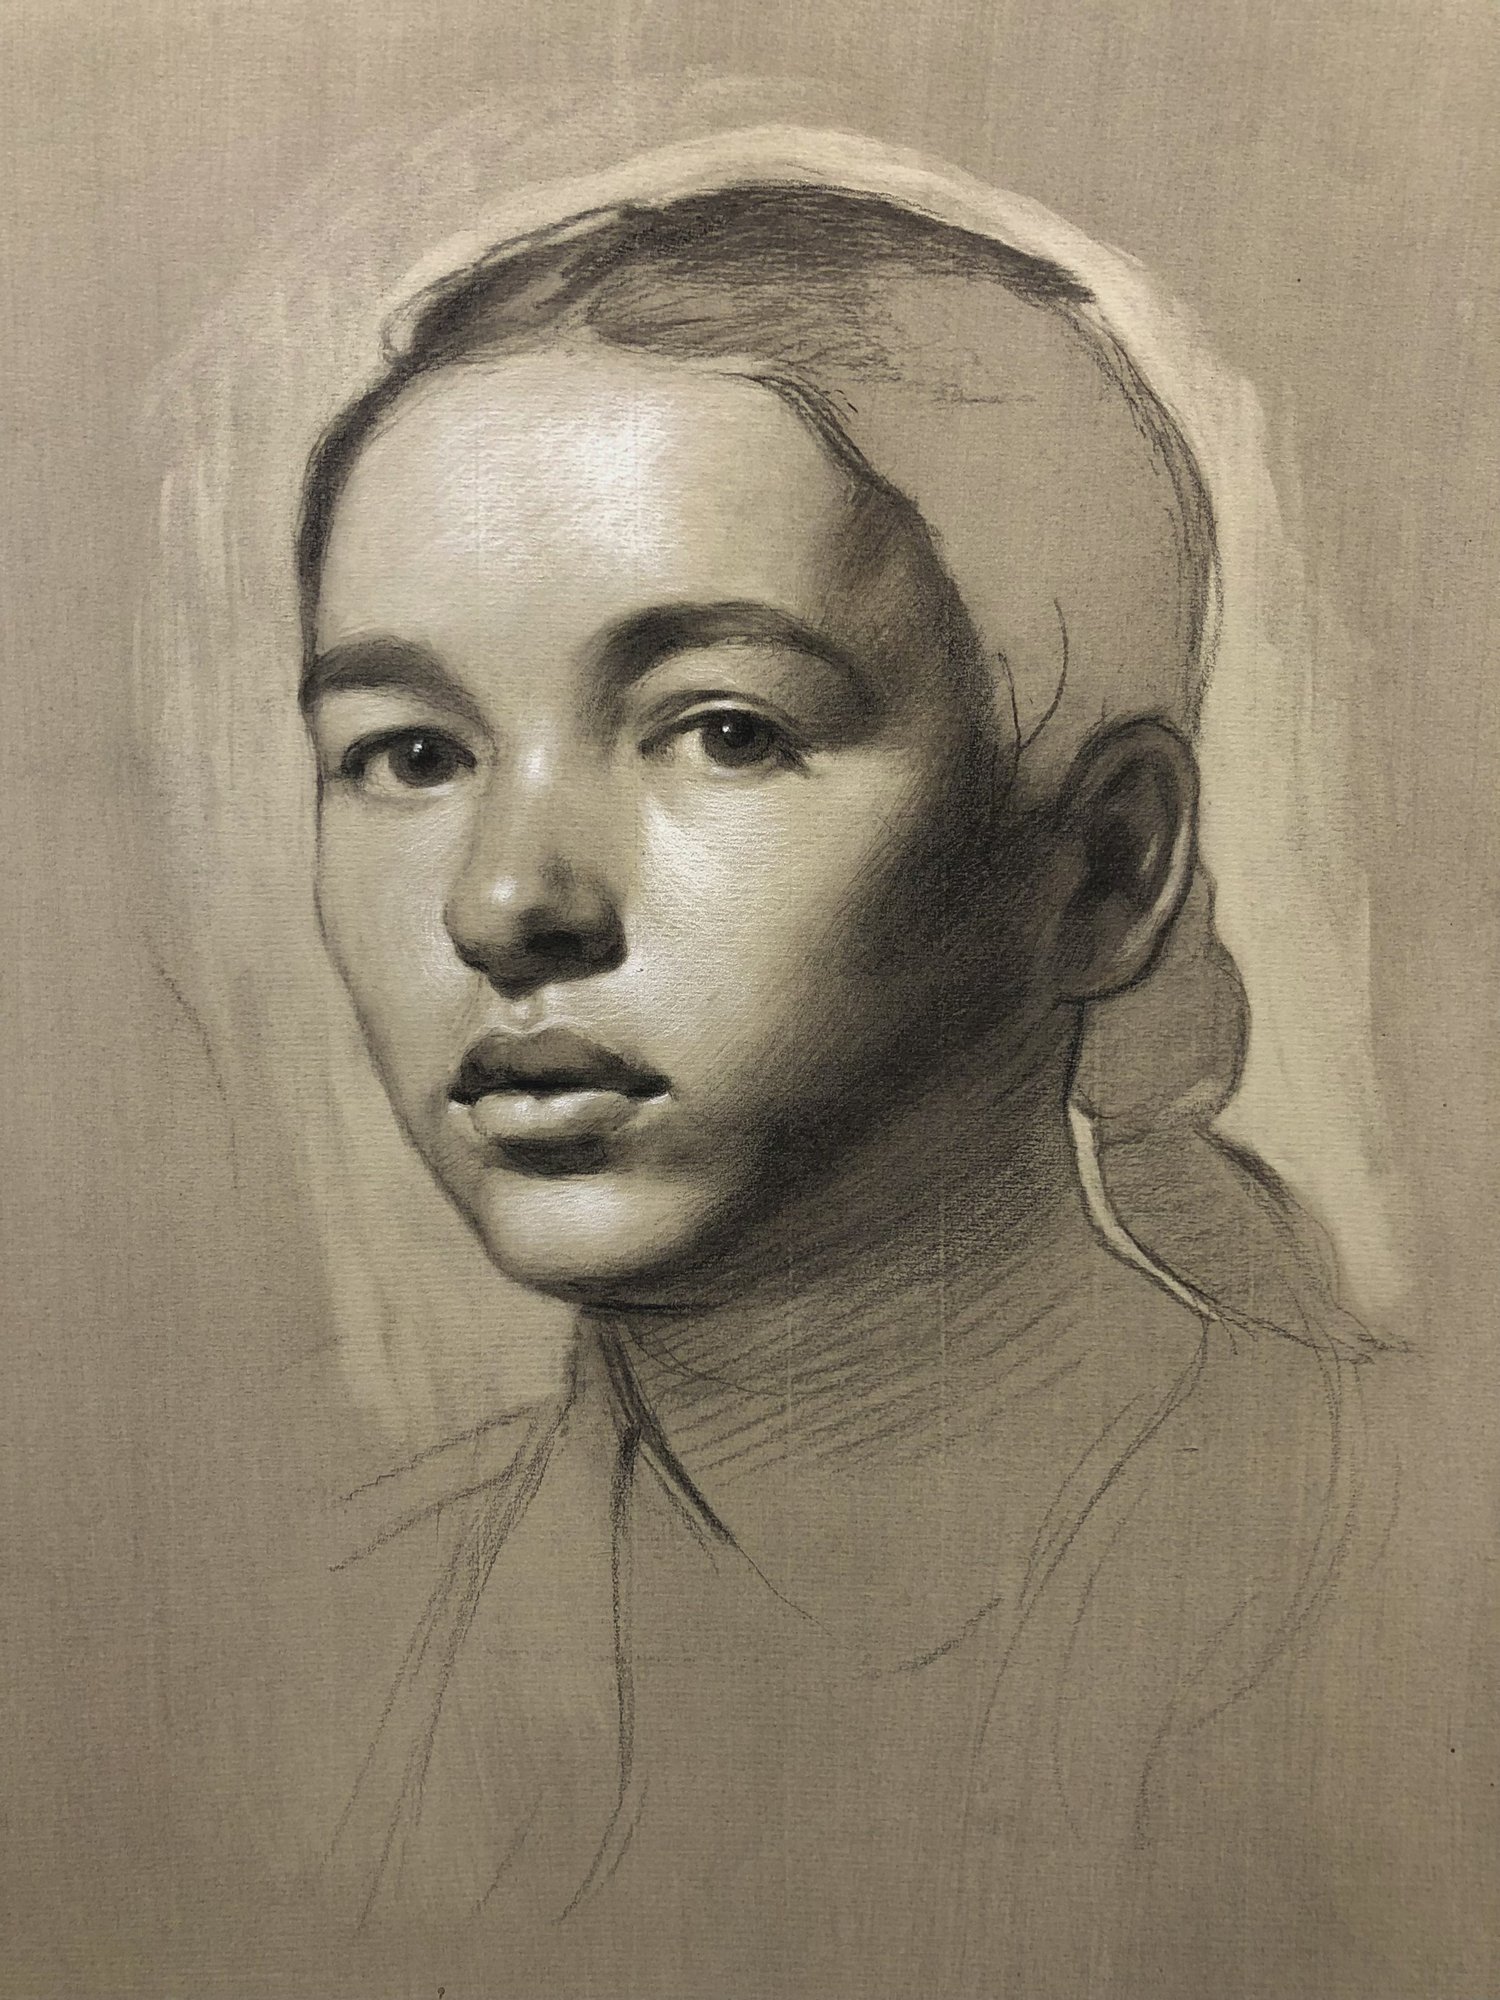
Project overview
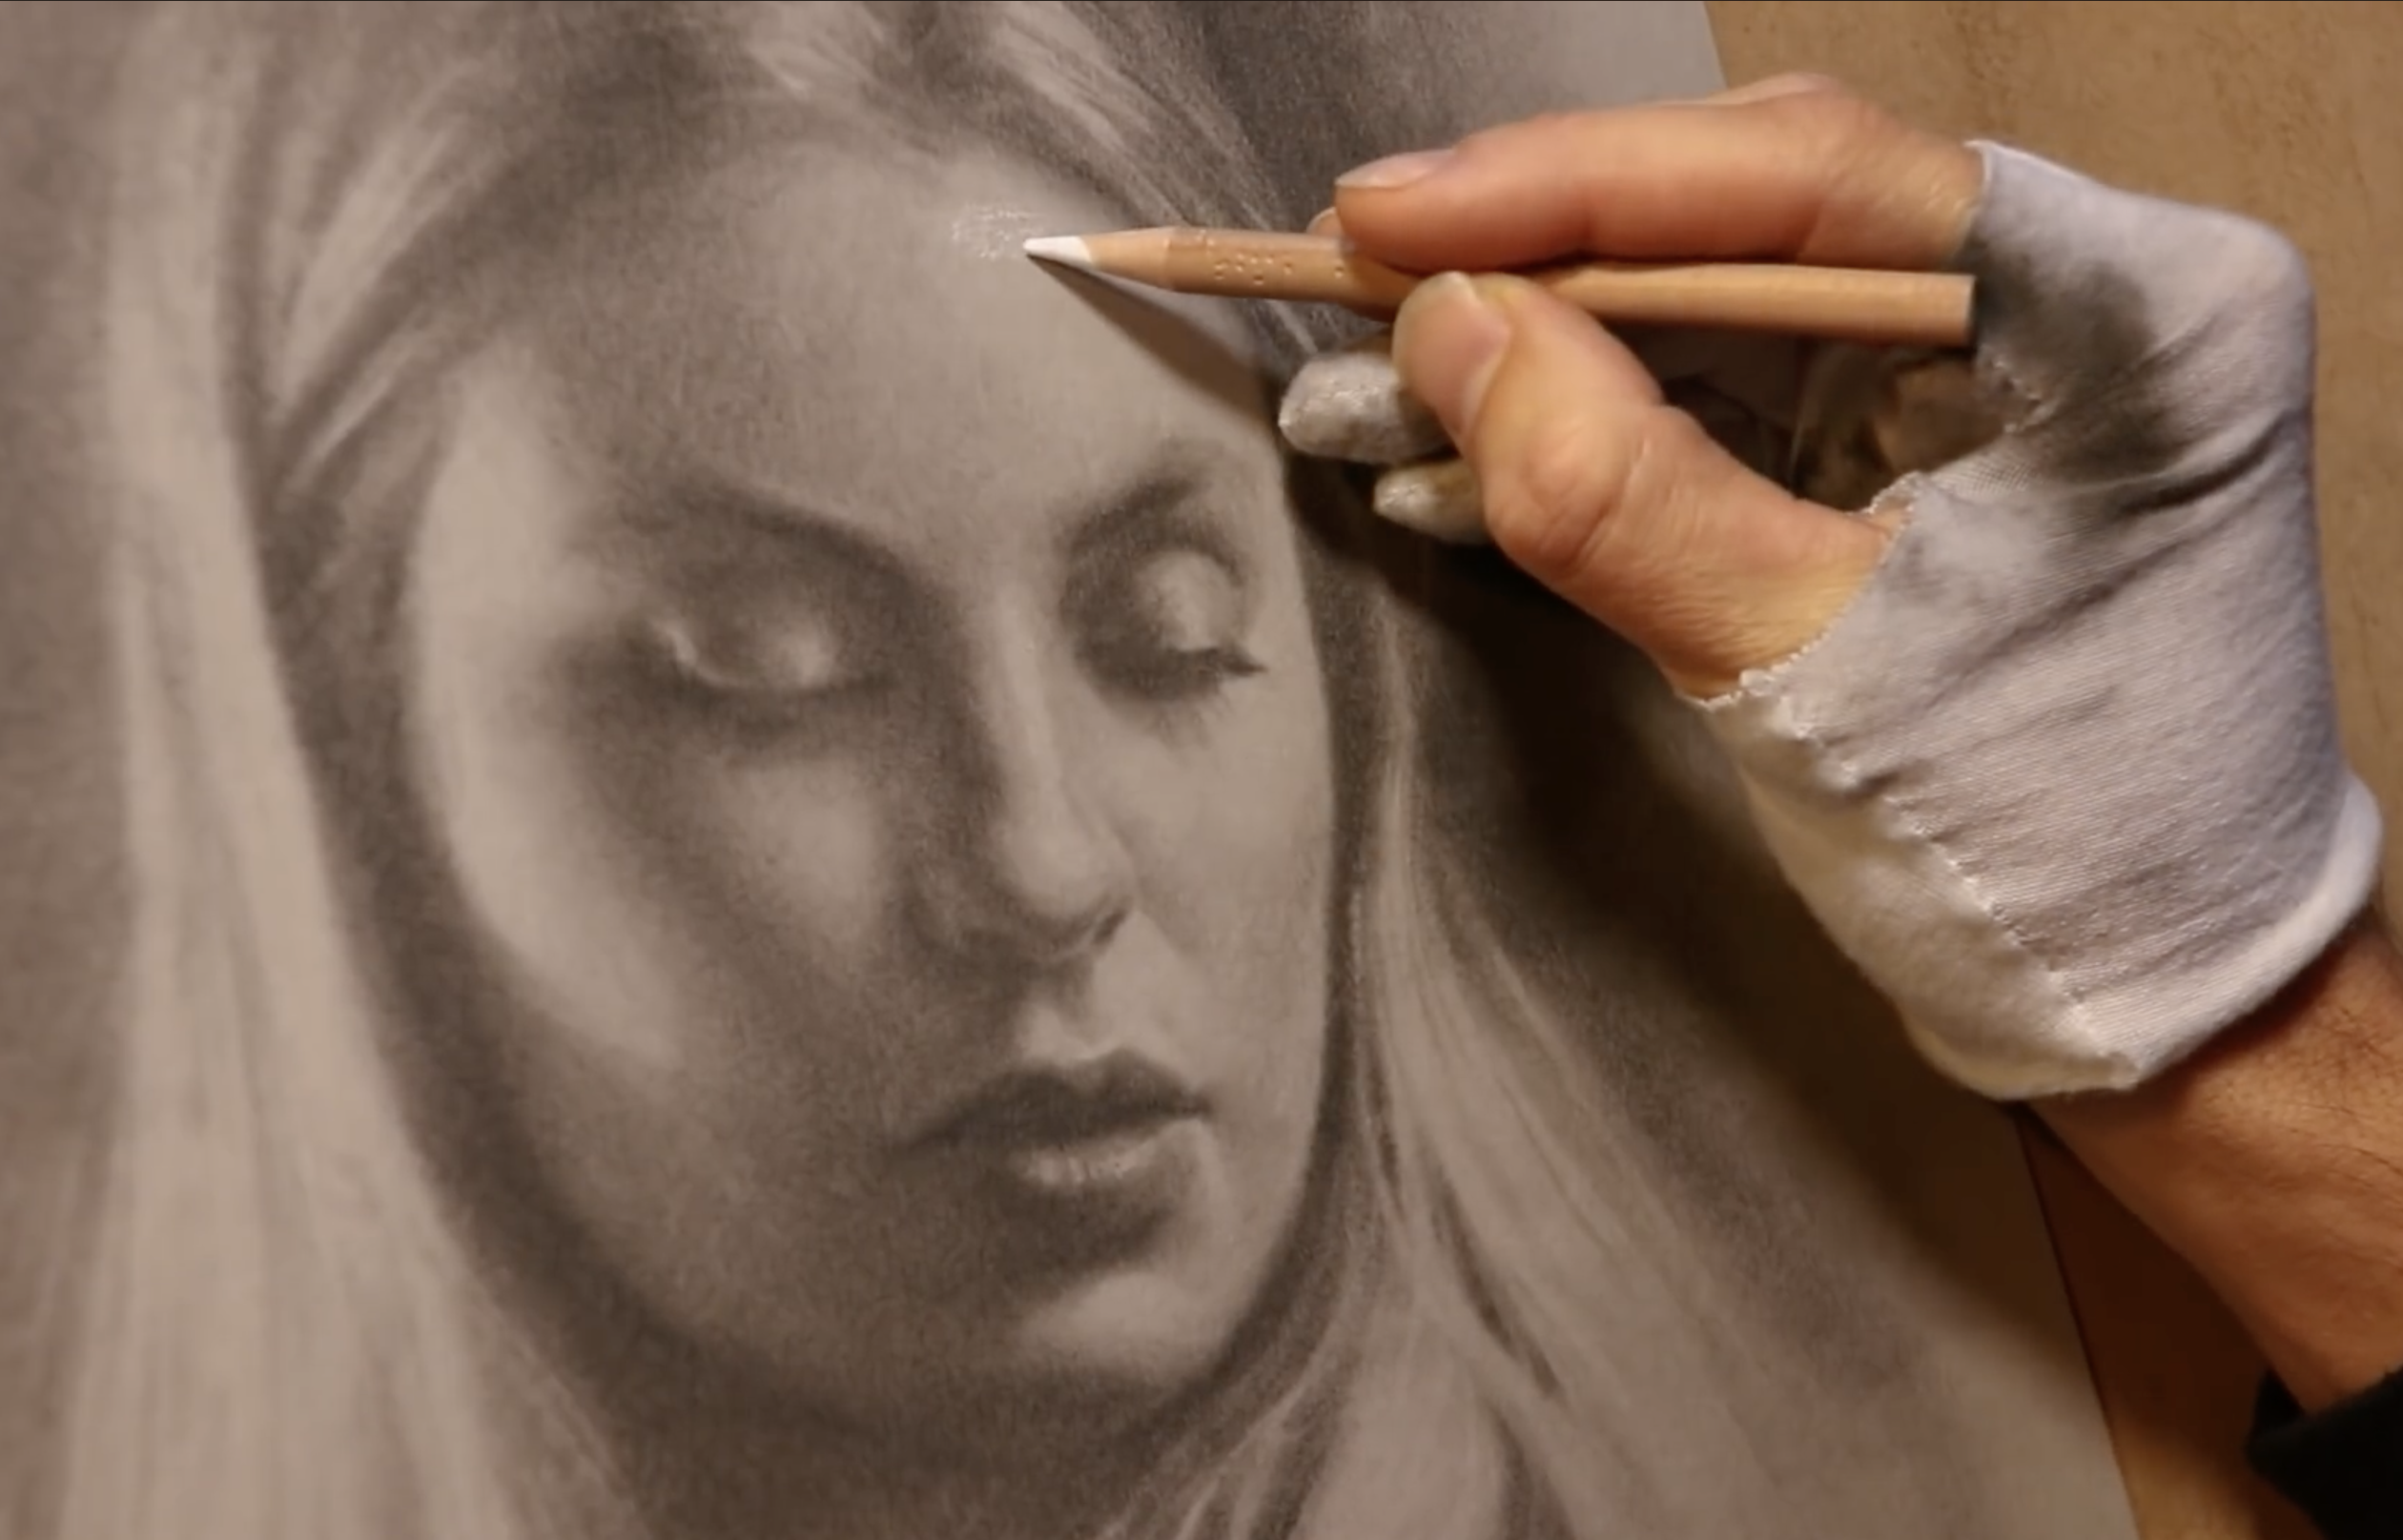
We’ll sketch a head lay-in, group light/shadow, then model forms with controlled passes of white and black chalk. Finish with crisp accents and edge control.
Tools & materials
- Toned sketch paper (gray/tan, medium tooth)
- White chalk / white pastel pencil
- Black chalk / charcoal pencil (HB–2B equivalent)
- Kneaded eraser, vinyl eraser
- Blending stump or soft tissue (optional)
- Fixative (light workable)
Paper & setup
- Size: ~9×12" (A4) is perfect for practice.
- Work upright or at a tilt to avoid smudging with your hand.
- Keep white chalk clean—wipe the tip on scrap paper as needed.
Step-by-step
Block-in the head
Use light marks to place an oval for the cranium and a wedge for the jaw. Add a center line and eye line for angle.
Map shadow shapes
With black chalk, connect big shadow masses (eye sockets, lower nose, under lip, neck). Keep it graphic—no details yet.
Place the lights
Introduce white chalk only in the core light areas (forehead plane, nose bridge, cheek, chin). Leave mid-tones as paper.
Model form
Use short, controlled strokes following form. Feather between paper mid-tone and your chalk. Blend lightly if needed.
Sharpen features
Refine eyes, nose, and mouth with crisper edges. Reserve the strongest white for the top highlights only.
Unify & fix
Soften distracting edges, darken the deepest accents, then mist a light workable fixative from 12–16" away.
Tips
- Work from large to small—save eyelashes and pores for last.
- Keep your palm off the paper; use a scrap sheet under your hand.
- Edge variety sells form: hard in focal features, soft along hairline.
Troubleshooting
- Muddy lights: Clean the white tip; lift grime with a kneaded eraser and reapply with fewer passes.
- Sticker-like highlights: Too opaque—feather edges and reserve pure white for 2–3 tiny spots.
- Flat face: Re-group big shadows, then gradate from shadow to paper to light.