
What you’ll learn
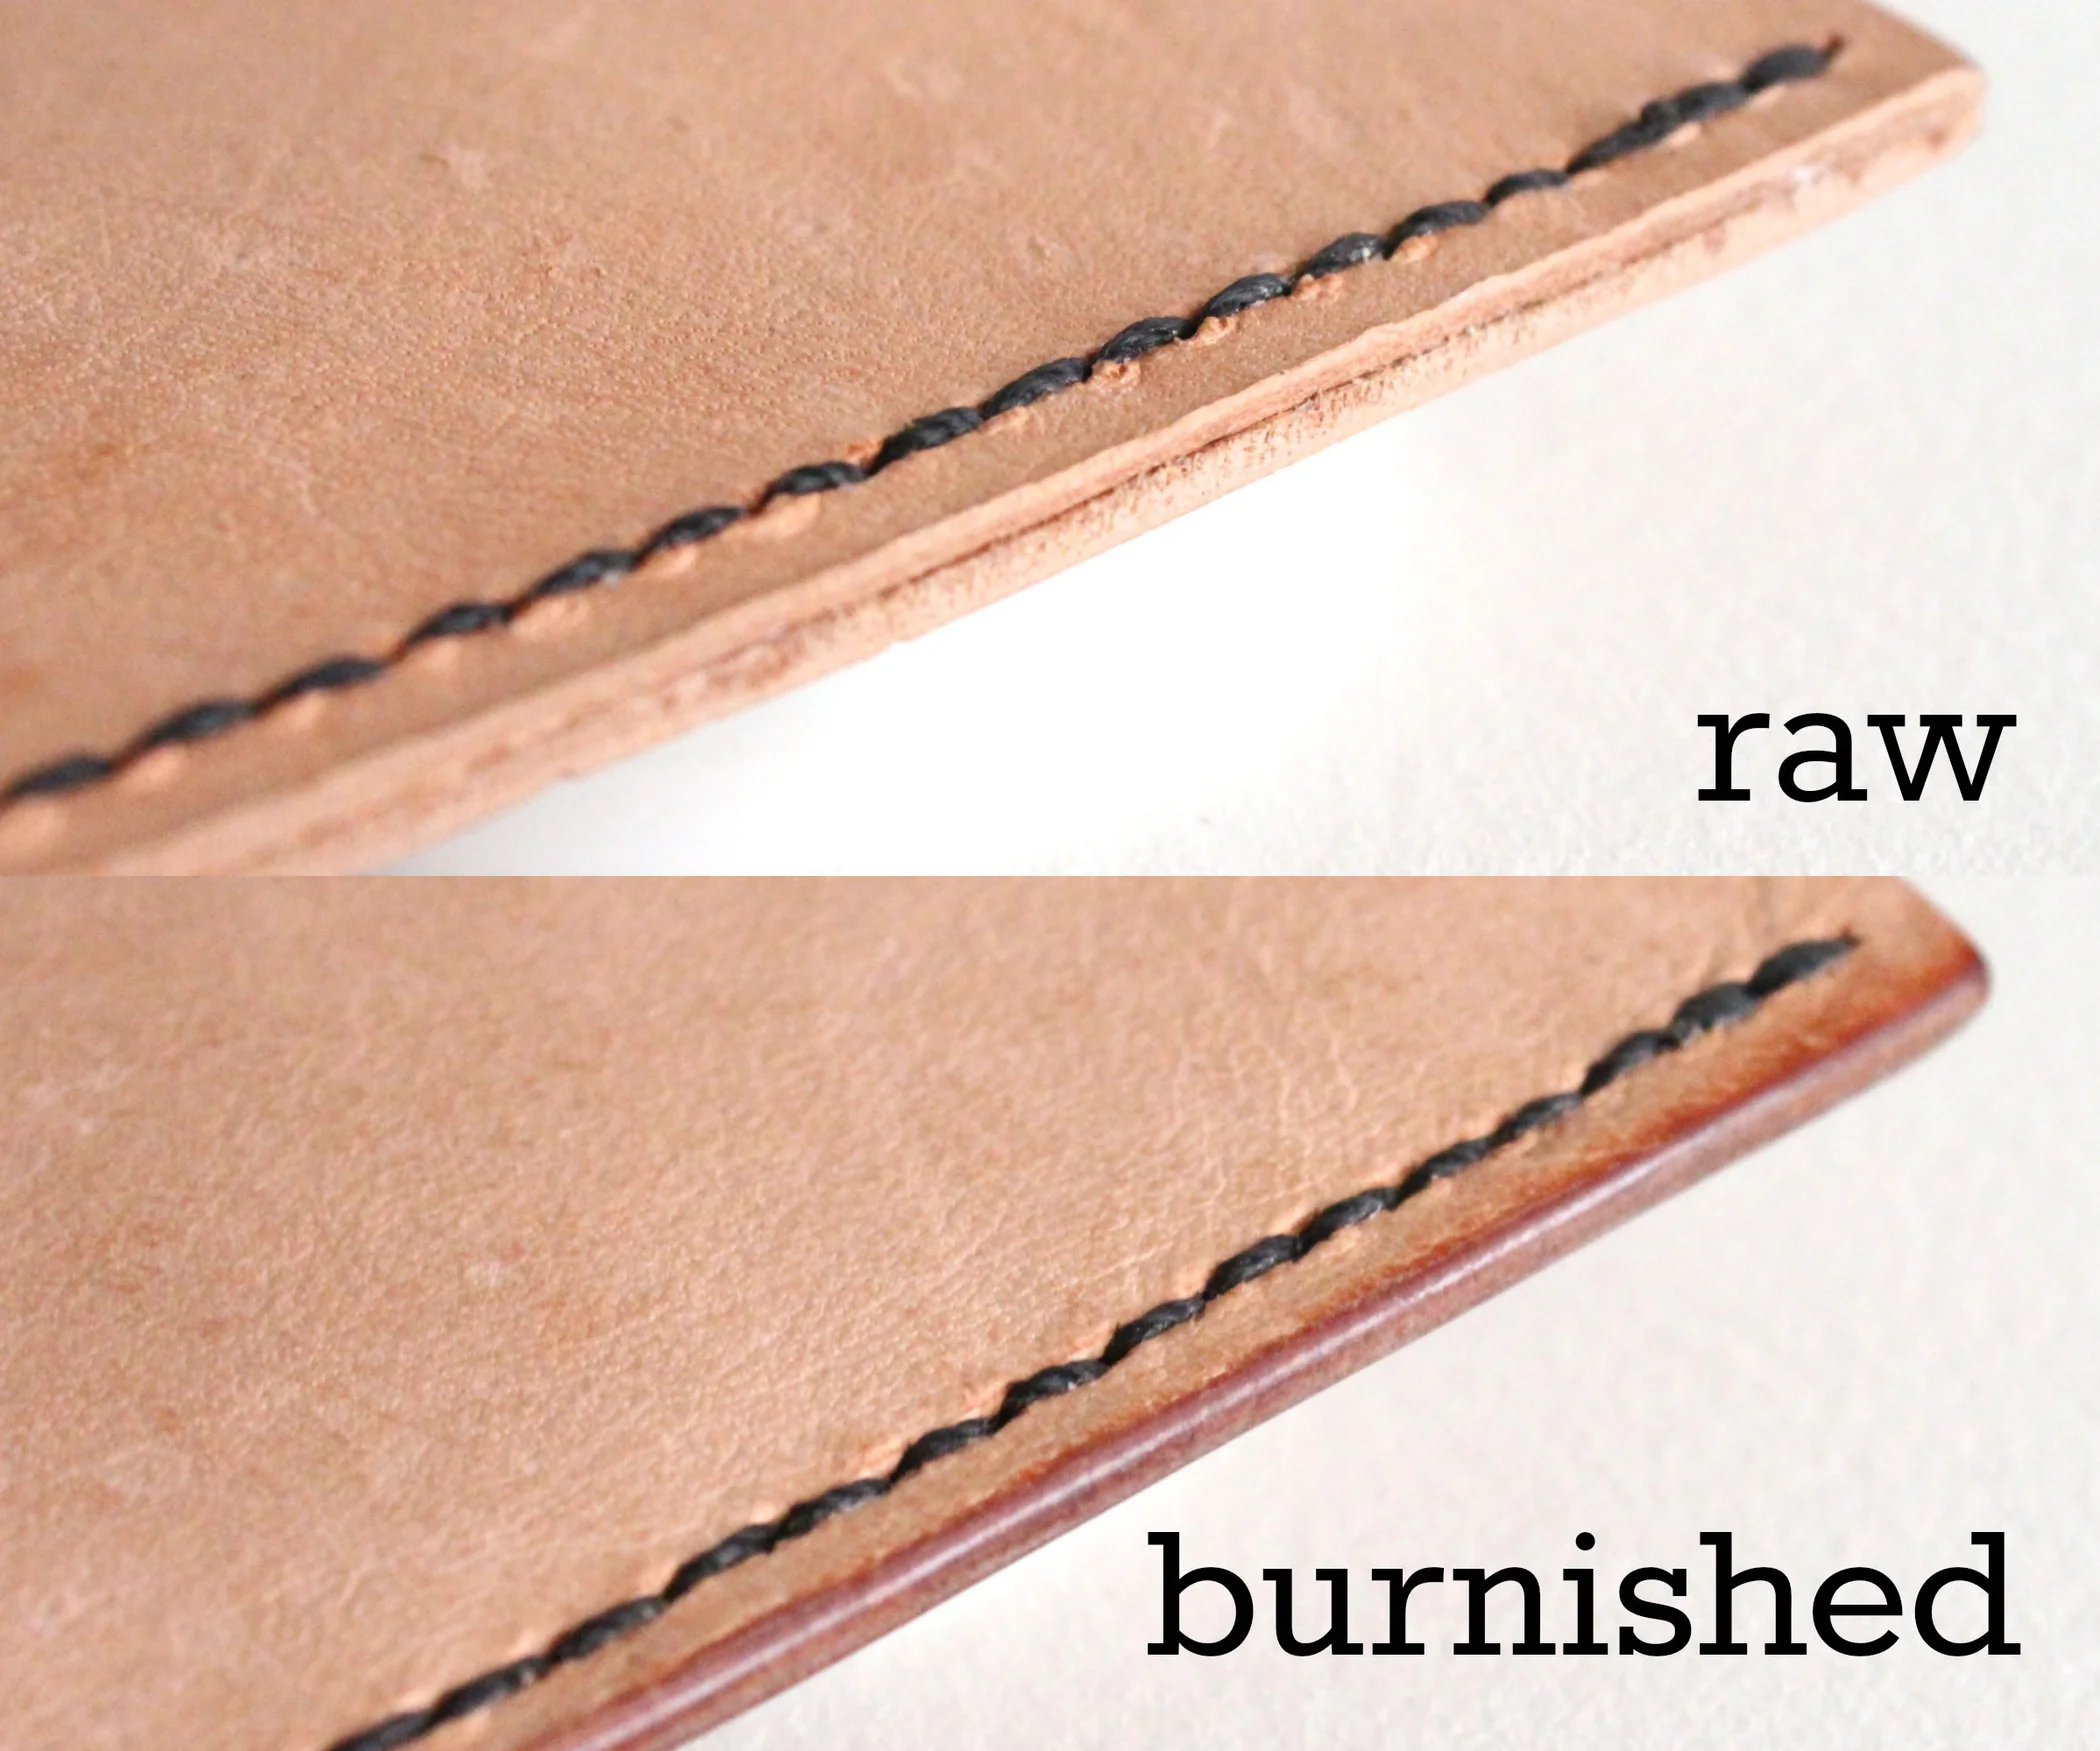
This tutorial shows a reliable, repeatable method to turn fuzzy edges into durable, smooth ones. You’ll prepare the edge, burnish with friction, then optionally color and seal for a long-lasting finish.
Tools & materials
- Edge beveler (size matched to leather thickness)
- Sandpaper 400→800 (or sanding sticks)
- Water or gum tragacanth / Tokonole
- Wood or bone burnisher (hand or drill-mounted)
- Cloth scrap or canvas for final polish
- Optional: edge dye, edge paint, beeswax/paraffin, heat creaser
Prep & setup
- Use veg-tan for classic glassy edges; many chrome-tans still improve with burnishing.
- Finish all cutting and punching before working edges.
- Protect your work surface; keep a damp sponge nearby.
Step-by-step
Bevel the edge
Run the beveler lightly on both sides to soften corners. Keep the tool upright and steady for a consistent round-over.
Sand smooth
Sand the edge with 400→800 grit using small, even strokes. You’re removing tooling marks and evening layers.
Dampen the edge
Lightly wet the edge with water or apply gum/Tokonole. It should feel slightly tacky, not soaked.
Burnish
Rub briskly with a wooden/bone burnisher until the edge darkens and shines. Add a touch more moisture if it squeaks.
Optional color
Apply edge dye or paint in thin coats. Let dry between passes. Lightly sand any ridges before the next coat.
Seal & polish
Rub a tiny amount of wax along the edge and burnish again. Final buff with cloth or canvas for a glassy finish.
Tips
- Short, repeated burnish passes beat one long aggressive pass.
- If the edge feels fuzzy again after drying, lightly sand and do one more quick burnish.
- Match beveler size to leather weight for nice, even domes.
Troubleshooting
- Matte, dull edge: Not enough friction or moisture—add a touch of water/gum and burnish longer.
- Edge gets mushy: Too wet—let it dry a minute, then burnish again.
- Uneven dome: Bevel both sides consistently; re-sand lightly and reburnish.